Development
Linux
Requirements
-
References:
Build environment preparation
- Install all required tools
$ sudo apt update
$ sudo apt upgrade
$ sudo apt install cmake gcc-arm-none-eabi libnewlib-arm-none-eabi build-essential
-
Prepare pico-sdk
- Clone pico-sdk repsitory
git clone https://github.com/raspberrypi/pico-sdk- Update pico-sdk
cd pico-sdk git pull git submodule update-
Set the PICO_SKD_PATH to the pico-sdk loaction
- Add exporting this environment variable to .bashrc file
vim .bashrc export PICO_SDK_PATH=~/path/to/pico-sdk ".bashrc" 119L, 3809B- Restart terminal
Building firmware
cd firmware
mkdir build
cd build
cmake ..
make -j
It will generate the 3-key.uf2 file in build directory.
Docker
For building the binary for RPi Pico, the dtrochow/3-key:latest container can be used.
Dockerfile is available in 3-key/docker directory.
Building on amd64 platform
docker build -t dtrochow/3-key:v0.0.1 .

# Pushing to repository
docker login
docker push dtrochow/3-key:v0.0.1
Building on arm64 platform
docker buildx build --platform linux/amd64 -t dtrochow/3-key:v0.0.1 .

# Pushing to repository
docker login
docker push dtrochow/3-key:v0.0.1
Uploading firmware UF2 binary to 3-key
Automatically
Requirements
The 3-key firmware can be build and loaded using build.py script.
It will perform the following actions:
-
Build firmware (
--cleanparameter will cause re-building all files) -
Below actions will be done only with
--loadparameter- Reset the RPi Pico device to bootloader
- Load the new firmware
- Reboot RPi Pico device
Example usage:
python3 ./build.py --clean --load
Manually
- Connect the
3-keyRPi Pico device withBOOTbutton pressed
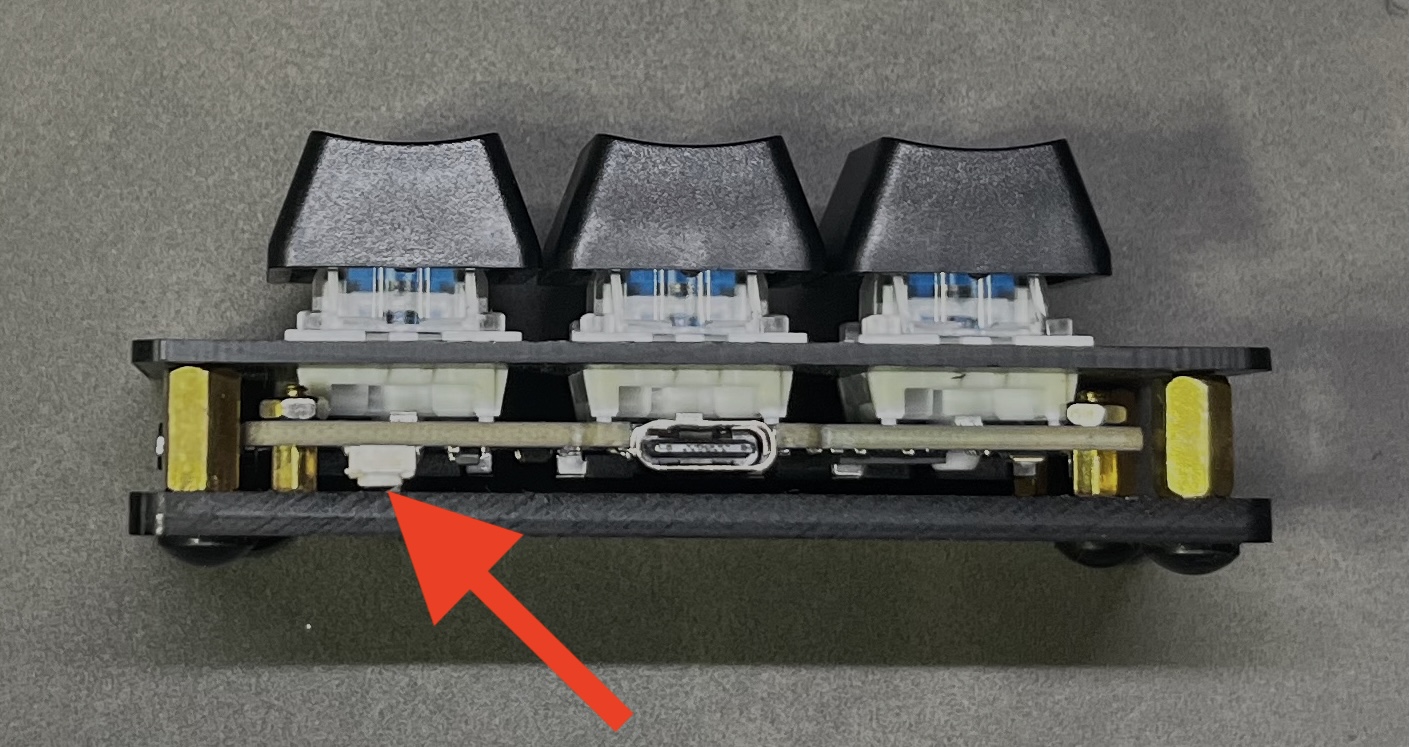
- Copy the
3-key.uf2binary to theRPI-RP2drive, which mounts when booting withBOOTbutton pressed
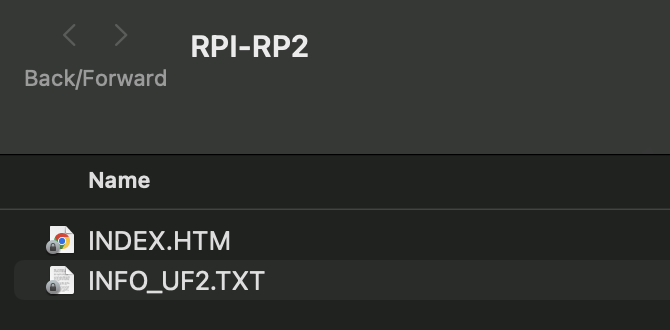
- Firmware is updated
Debug environment preparation
-
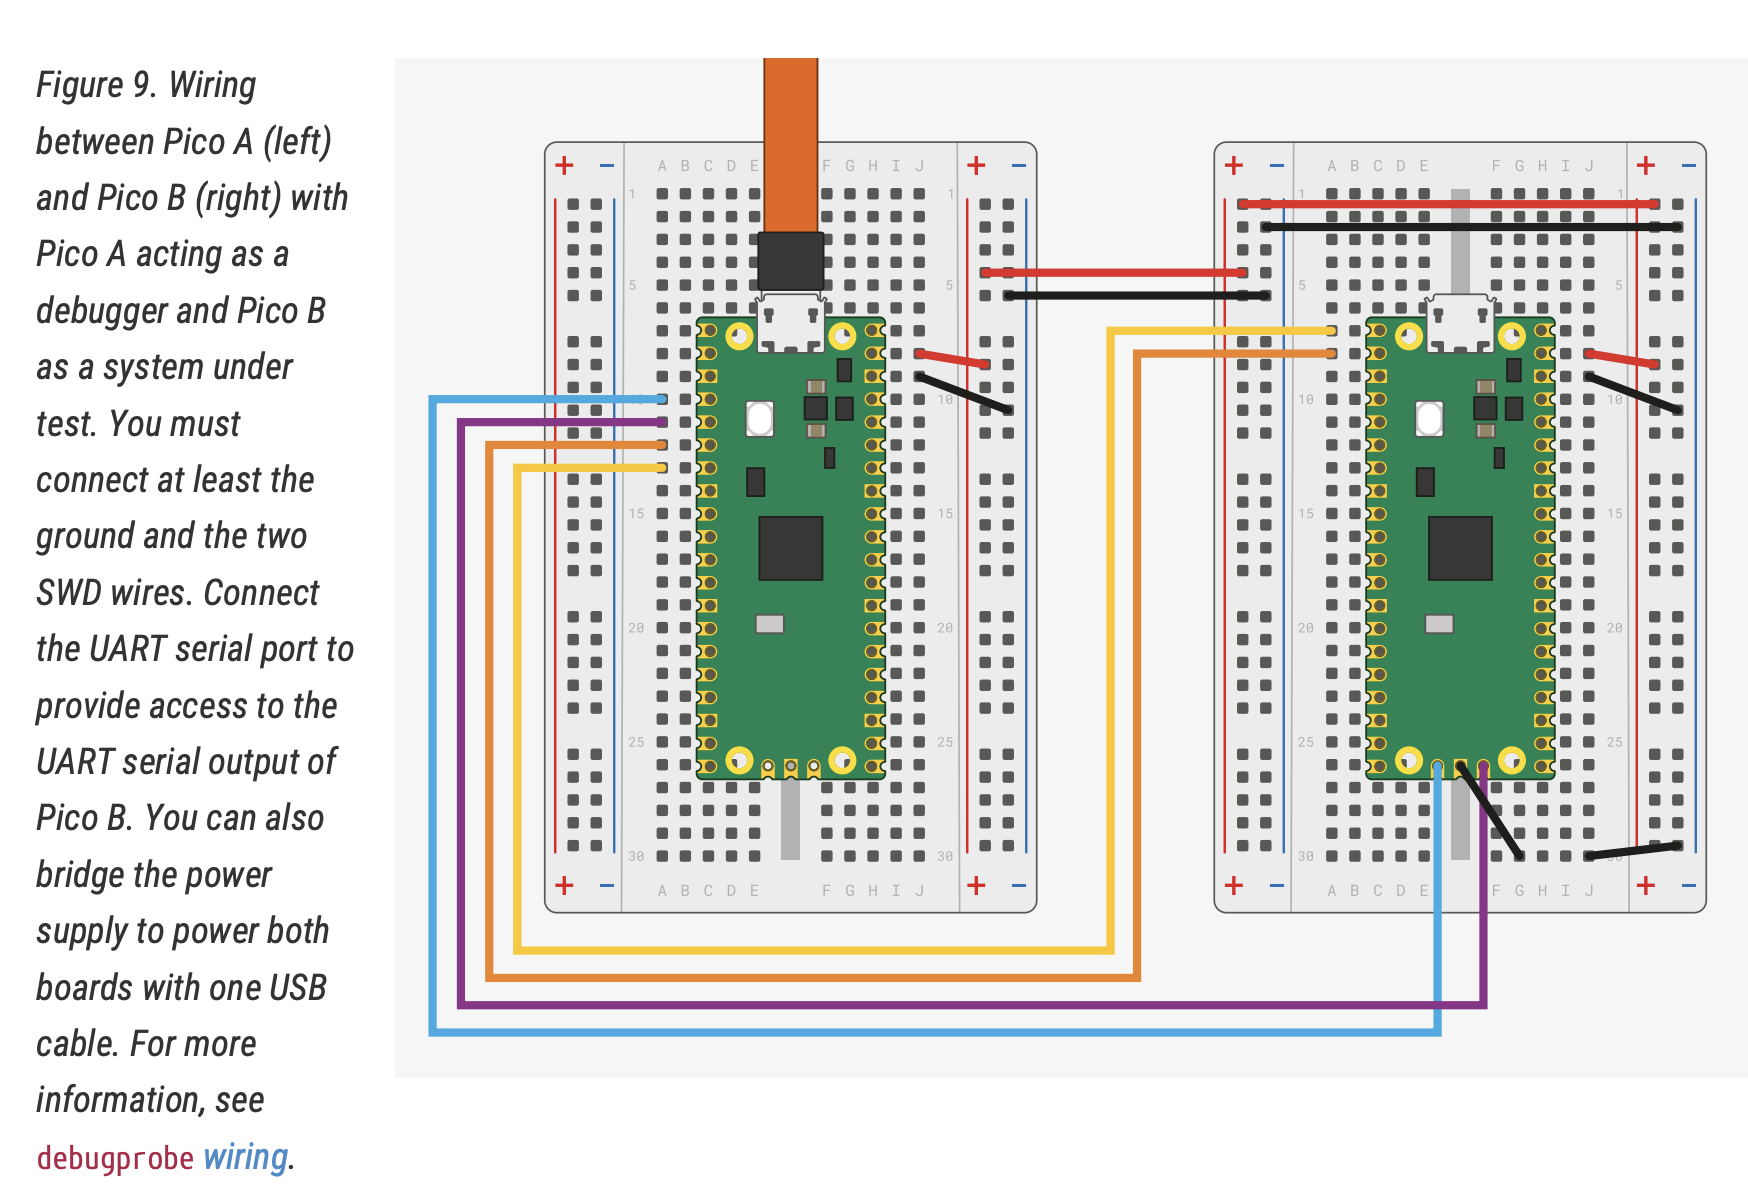
Wiring
All wiring is described in Getting started with Raspberry Pi Pico
-
Prepare PicoProbe
-
Clone picoprobe repository
cd ~/pico git clone https://github.com/raspberrypi/picoprobe.git- Build picoprobe
cd picoprobe mkdir build cd build cmake .. make -j4- Flash the picoprobe FW on Raspberry Pi Pico
- Boot the Raspberry Pi Pico which will be used as a debugger with the BOOTSEL button pressed and drag on picoprobe.uf2.
-
Change PicoProbe USB device privilages
The PicoProbe USB device needs to has proper privilages in Linux OS, to avoid using sudo privilages during debugging
-
Use following command
To find the idVendor and idProducd you can useecho 'SUBSYSTEMS=="usb", ATTRS{idVendor}=="2e8a", ATTRS{idProduct}=="0004", GROUP="users", MODE="0666"' | sudo tee -a /etc/udev/rules.d/98-PicoProbe.rules sudo udevadm control --reloadlsudb -vvvcommand.You need to find thhose fields under
Raspberry Pi Picoprobe.
-
-
Prepare OpenOCD server
-
Install required tools
- Clone openocd repositorycd ~/pico sudo apt install automake autoconf build-essential texinfo libtool libftdi-dev libusb-1.0-0-devgit clone https://github.com/raspberrypi/openocd.git -
Build openocd with picoprobe support enabled
- You can check if PicoProbe and OpenOCD server works properly by running this command when every connection is established properlycd openocd ./bootstrap ./configure --enable-picoprobe make -j4src/openocd -f interface/picoprobe.cfg -f target/rp2040.cfg -s tcl
-
-
Prepare VSCode debug configuration
- Install
Cortex-Debugextension in VSCode - Install
C/C++andC/C++ Extension Packextensions in VSCode -
Create following configuration files under
.vscodedirectorylaunch.json
In some cases the serverpath field needs to be added - issue{ "version": "0.2.0", "configurations": [ { "name": "Pico Debug", "cwd": "${workspaceRoot}", "executable": "<path_to_binary_with_FW>", "request": "launch", "type": "cortex-debug", "servertype": "openocd", "serverpath": "<path_to_openocd_repo>/src/openocd", // This may need to be arm-none-eabi-gdb depending on your system "gdbPath" : "arm-none-eabi-gdb", "device": "RP2040", "configFiles": [ "interface/picoprobe.cfg", "target/rp2040.cfg" ], "svdFile": "${env:PICO_SDK_PATH}/src/rp2040/hardware_regs/rp2040.svd", "runToMain": true, // Work around for stopping at main on restart "postRestartCommands": [ "break main", "continue" ], "searchDir": ["<path_to_openocd_repo>/openocd/tcl"] } ] }settings.json
{
    // These settings tweaks to the cmake plugin will ensure
    // that you debug using cortex-debug instead of trying to launch
    // a Pico binary on the host
    "cmake.statusbar.advanced": {
        "debug": {
            "visibility": "hidden"
        },
        "launch": {
            "visibility": "hidden"
        },
        "build": {
            "visibility": "default"
        },
        "buildTarget": {
            "visibility": "hidden"
        }
    },
    "cmake.buildBeforeRun": true,
    "C_Cpp.default.configurationProvider": "ms-vscode.cmake-tools",
    "cortex-debug.openocdPath": "<path_to_openocd_repo>/openocd/src/openocd"
}
- Install
 Source:
 Windows
How to attach Picoprobe to the Docker container
To enable debugging with the Picoprobe on Windows using Docker, follow these steps:
- Enable Docker Integration with Additional Distros:
- Open Docker Desktop.
- Go to the Settings menu.
-
Under the Resources tab, enable the option: Enable integration with additional distros.
-
Share the USB Device with WSL: You will need to bind the USB device to WSL to make it available to the Docker container. Follow the steps below:
-
Open PowerShell as an administrator.
-
List all connected USB devices by running:
usbipd list -
Find your Picoprobe device in the list (e.g., it might show something like
2e8a:0004 Urządzenie szeregowe USB (COM13), Picoprobe). -
Bind the Picoprobe device to WSL:
usbipd bind --busid <BUSID>Replace
<BUSID>with the appropriateBUSIDof your Picoprobe device. -
Attach the device to WSL:
usbipd attach --wsl --busid <BUSID> -
Run Docker with USB Device and verify device is present: After binding and attaching the device, you can run the Docker container with access to the Picoprobe device and :
Then verify the device is present using:docker run -it --rm --privileged --device /dev/ttyACM0 3key:latest bashYou should see your device listed (e.g., /dev/ttyACM0 or similar).ls /dev/tty*